Sunday 10 October 2010

Bat Detector Circuit This Bat Detector Circuit is authored by Chris Eve. Basic tests with a variety of salvaged electret microphones all showed good

Bat Detector Circuit

This Bat Detector Circuit is authored by Chris Eve. Basic tests with a variety of salvaged electret microphones all showed good response to 50kHz and beyond, the smaller the unit the better the response. My tests indicate that a small electret microphone has at least some response to 100kHz and that this response is reasonably "flat" to at least 50kHz.


The microphone I use is approximately 6mm in diameter and can be mounted within the body of a 3.5mm jack plug. Having the microphone socketed rather than fixed within the detector case is optional, but gives further opportunity to experiment with uni-directional or "Pressure Zone" modules (see below), or other microphones mounted remotely from the electronics.

This bat detector circuit to have better sensitivity, both in distance to a visible bat and in audio frequency, than some other published circuits using a 40kHz transducer with 4000x gain amplification, though the 40kHz transducer I used for the comparison may have a bearing on these results.

The high-pass filter is included purely to help eliminate the circuit being triggered by ambient noise. The filter is a 4-pole Chebychev with a very steep roll-off below 15kHz. There is virtually zero response at 10kHz and below. This type of circuit relies on the wanted signal being loud enough to trigger the CMOS counter, so the less unwanted signal that reaches the circuit the better. Whilst any of the basic circuits based around a 40kHz transducer will perform adequately for the detection of bats calling within that frequency range, which includes many of the more common species, this circuit will give much better indication of the presence of less-common bats that call at lower frequencies, around 20kHz, as well, hopefully, those at somewhat higher frequencies.

When used at dusk, when individual bats are still visible, pointing a unidirectional microphone at a solitary bat indicates a usable range of at least 100ft (30m). Bats actually call very loudly indeed ... it's probably a good job we cannot hear them, else they would keep us awake!


This circuit was built in a metal box, because that was what I had to hand, using point-to-point wiring on a ground-plane. Perforated strip-board should be perfectly adequate and probably a lot easier to fault-find should you make a mistake. I do not have nor intend to produce a pcb layout, so please do not ask for one, though if you should feel the need to produce one and have the inclination to share it I would be only too willing to include it (or a link to it) on this page. The circuit may be more susceptable to interference from electronic sources if built in a plastic container. Current consumption is around 15mA with no audio output, so a PP3 battery should last for several evenings unless you have got a lot of bats in your area. For regular or extended use, rechargeable batteries or an external power source would make sense. Note that the LM386 has an absolute maximum voltage of 15v (12v recommended), but the rest of the circuit is OK to 15v. Also be aware, if tempted to use a regulated supply incorporating a 78xx series regulator, that these do generate a lot of noise, so extra filtering could be necessary, especially on the microphone supply. Component choice for the high-pass filter section is critical for good results, close-tolerance low-noise resistors and capacitors should be used to achieve the expected performance. Similar low-noise components should also be used in the rest of the circuit, (no carbon resistors!), though the tolerances are less critical elsewhere.

Having the microphone and loudspeaker both mounted on/in the detector itself can result in unwanted feedback limiting the volume the speaker can be used at. With the microphone mounted on the detector, simply handling the unit can cause audio output, though this can be reduced to a minimum if the unit is held firmly and moved gently. Remote mounting of the speaker and/or microphone, the use of a uni-directional microphone module (also helpful to determine where the bat is or for listening to an individual bat), or at least having the speaker facing away from the microphone, all help reduce/eliminate feedback, making it easier to share the experience with others.

Source: Bat Detector Circuit
See more : Oxygen Sensor

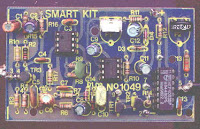
UltraSonic Radar [Ultrasonic Radar Circuit Board 2] This is a ultrasonic radar project with many practical applications in security and alarm systems


This is a ultrasonic radar project with many practical applications in security and alarm systems for homes, shops and cars. It consists of a set of ultrasonic receiver and transmitter which operate at the same frequency. When something moves in the area covered by the circuit the circuit’s fine balance is disturbed and the alarm is triggered. The circuit is very sensitive and can be adjusted to reset itself automatically or to stay triggered till it is reset manually after an alarm.


Adjustments
This kit does not need any adjustments, if you follow the building instructions.

Warning
If they are used as part of a larger assembly and any damage is caused, our company bears no responsibility.

While using electrical parts, handle power supply and equipment with great care, following safety standards as described by international specs and regulations.

If it does not work
Check your work for possible dry joints, bridges across adjacent tracks or soldering flux residues that usually cause problems. Check again all the external connections to and from the circuit to see if there is a mistake there.

See that there are no components missing or inserted in the wrong places.
Make sure that all the polarised components have been soldered the right way round. Make sure that the supply has the correct voltage and is connected the right way round to your circuit. Check your project for faulty or damaged components.

If everything checks and your project still fails to work, please contact your retailer and the Smart Kit Service will repair it for you.

Parts List
R1 = 180 KOhm C1, 6 = 10uF/16V TR1, 2, 3 = BC547 , BC548
R2 = 12 KOhm C2 = 47uF/16V P1 = 10 KOhm trimmer
R3, 8 = 47 KOhm C3 = 4,7 pF P2 = 47 KOhm trimmer
R4 = 3,9 KOhm C4, 7 = 1 nF IC1, 2 = 741 OP-AMP
R5, 6, 16 = 10 KOhm C5 = 10nF IC3 = 4093 C-MOS
R7, 10, 12, 14, 17 = 100 KΩ C8, 11 = 4,7 uF/16V R = TRANSDUCER 40KHz
R9, 11 = 1 MOhm C9 = 22uF/16V T = TRANSDUCER 40KHz
R13, 15 = 3,3 KOhm C10 = 100 nF D1, 2, 3, 4 = 1N4148
C12 = 2,2 uF/16V
C13 = 3,3nF
C14 = 47nF


Source: UltraSonic Radar
See More : Audio Detector

Lie Detector Circuit #2 This lie detector circuit can be built in a few minutes, but can be incredibly useful when you want to know if someone is rea

Lie Detector Circuit #2

This lie detector circuit can be built in a few minutes, but can be incredibly useful when you want to know if someone is really telling you the truth. It is not as sophisticated as the ones the professionals use, but it works. It works by measuring skin resistance, which goes down when you lie.


Parts List:

R1 - 33K 1/4W Resistor
R2 - 5K Pot
R3 - 1.5K 1/4W Resistor
C1 - 1uF 16V Electrolytic Capacitor
Q1 - 2N3565 NPN Transistor
M1 - 0-1 mA Analog Meter
MISC - Case, Wire, Electrodes (See Notes)

Notes:
  1. The electrodes can be alligator clips (although they can be painful), electrode pads (like the type they use in the hospital), or just wires and tape.
  2. To use the circuit, attach the electrodes to the back of the subjects hand, about 1 inch apart. Then, adjust the meter for a reading of 0. Ask the questions. You know the subject is lying when the meter changes.

Source: Lie Detector circuit
See more : Oxygen Sensor Simulator

Saturday 9 October 2010

PHP Tutorial: Writing A Feedback Form Script Getting Started with PHP: Write a FormMail Script in PHP

PHP Tutorial: Writing Your First PHP Script: Feedback Form Script

by Christopher Heng, thesitewizard.com

I have always believed that the most fun way to learn a new programming language, whether it is a language like C or a scripting language like PHP, is to use it to write a real-life useful program. Of course this is not the most systematic method of learning, but it works well if you already have some background in programming.

Preliminaries

  1. Before you write your first PHP program, make sure that that your website is running on a web host that runs PHP 4.1 or above.

  2. You may also find it useful to have a copy of PHP 4.1 or later installed on your own computer. This makes testing your PHP scripts much easier. If you use Windows, you can find some tips on installing PHP on your own computer from my article on "How to Install and Configure PHP 5 to Run with Apache on Windows" at http://www.thesitewizard.com/php/install-php-5-apache-windows.shtml

  3. And of course, you will need an ASCII text editor of some kind (such as Notepad on Windows). There's a list of such editors on http://www.thefreecountry.com/programming/editors.shtml

  4. This tutorial also assumes that you have at least some knowledge of HTML. This is necessary because if I have to explain all the HTML tags as well, this tutorial will end up being tediously long.

  5. You'll probably need a bit of programming background, or at the very least, an aptitude for computer programming. Note that being able to code in HTML does not count, since HTML is not a programming language. Unlike the majority of the other articles on thesitewizard.com, this article is not targeted at the absolute newcomer. You really need background in both web design using HTML and a bit of programming skill/aptitude, otherwise this article will be indecipherable. If you are reading this article because you want to create a website, please start with How to Make / Create Your Own Website: The Beginner's A-Z Guide instead.

I will begin with a very rudimentary (but working) PHP script to take input from a feedback form and send it to you in an email message. This type of form is sometimes referred to as a FormMail or Form to Mail script. In later articles, I will develop that script (and others) to include features commonly found in such FormMail scripts.

If you are programming-savvy, you will recognize this as a sort of "Hello World" program, but infinitely more useful!

Writing the Feedback Form

The first thing we need to do is to write the feedback form itself. Put the following code in the section of an HTML file named, say, feedback.html.

Email:
Message:

Basically the form asks the visitor for his email address (the field named "email" found in input name="email" above) and message (the field named "message" found in textarea name="message"), and presents him with a button which he can click to submit the contents of the form. When the form is submitted, it is "posted" (see the "method" attribute of the

tag) to a script named "sendmail.php" (also specified in the tag).

The Feedback Form PHP Script

Now all that remains is to code "sendmail.php". This is made extremely easy by the facilities available in PHP. Type the following code into a file named "sendmail.php". Do not put anything else into that file, ie, don't put in any other HTML tags or headers, etc.


When the form is submitted to sendmail.php, the contents of the "email" field in the form is put into a PHP variable called $_REQUEST['email']. Likewise the contents of the "message" field is put into the variable $_REQUEST['message'].

If you had named the fields in your form "emailofsender" and "contentsofmessage", then the information submitted in those fields would have been available to your script in the variables $_REQUEST['emailofsender'] and $_REQUEST['contentsofmessage'] respectively. I think you get the idea.

The first thing we do in our PHP script is to make the information that is submitted easily accessible to the rest of the program.

Firstly, we made a copy of the contents of $_REQUEST['email'] in a variable we call $email. This was done in the line

$email = $_REQUEST['email'] ;

Note that we don't really have to call this new variable $email. We could have called it $thingamajig if we wished, but it makes sense to name a variable with some meaningful name.

Likewise, in the next line, we made a copy (assigned) of $_REQUEST['message'] in a variable $message.

$message = $_REQUEST['message'] ;

Again, we could have named the new variable anything we wanted — but it's easier for us to understand the program if the variable name reflects what it does.

The real workhorse of this script is in the line beginning with "mail".

mail( "yourname@example.com", "Feedback Form Results",   $message, "From: $email" ); 

mail is a special function in PHP that sends mail. The first parameter to mail is supposed to contain the email address you want the form contents to be sent to, such as your own email address. The second parameter is the "Subject" of the email message. The last two parameters are the content of the message and the headers you want sent, respectively. We want a "From" header so that we know who is sending the email to us and can reply to him/her if we need to.

Notice that, like many other programming languages, strings (sequences of characters) are enclosed in double quotes, such as "Feedback Form Results".

Variables like $message can be used as-is. Note also that you can also interpolate (introduce) the contents of the variable $email into a string, like "From: $email", so that if your $email string contained an address like "william@shakespeare.com", the final string that is passed to the mail function will be "From: william@shakespeare.com".

You can also use single quotes (such as those in 'Hi there') to quote strings, but when you do so, the variables included are not expanded. This is useful if, for some reason, you really want to pass the string 'From: $email' to mail without PHP translating that to "From: william@shakespeare.com".

Finally, it is appropriate to thank the visitor for his message. This is done with the line

header( "Location: http://www.example.com/thankyou.html" );

This line causes PHP to send an HTTP header back to the visitor's browser telling it to load the URL "http://www.example.com/thankyou.html". The "header" function allows us to send any HTTP header to the browser.

You will of course have to create such a file called "thankyou.html" with some sort of message to thank your visitor for his efforts, otherwise your visitor will be greeted with an unfriendly "404 File Not Found" error after he sends his message. You should also replace the URLs and email addresses with the correct ones if you want to use that script on your site.

By the way, the script has to be enclosed within the "" and "?>" tags because the PHP processor treats all input as HTML code unless otherwise specified. On most systems, you can simply use "" and "?>" as the opening and closing tags to get the script to work, however if you want to be sure that your script will work on all systems, you should use the full "" form for the opening tag.

Easy wasn't it? In just a few lines, you've written your first PHP script. And it's not some trivial and useless script — it is actually a working, usable program.

Before you put the script "live" on the Internet, check out the following additional tutorials:

  • In How to Improve Your Form to Mail Script, you will develop the script so that your visitor's input is checked to catch instances where someone accidentally clicks the "Submit" button before they fill in their email address. You will also learn how to integrate both the form and the script into a single "feedback.php" file if you wish.

  • The article How to Prevent Email Injection in Your PHP Form to Mail Scripts deals with the security aspects of putting a PHP form to mail script "live" on the Internet, where spammers can abuse it and hijack it to send spam to others.

Copyright 2000-2010 by Christopher Heng. All rights reserved.

Get more free tips and articles like this, on web design, promotion, revenue and scripting, from http://www.thesitewizard.com/